


The last article discussed how to do a physical exam of the head, neck, and shoulder assembly of the dog. We will now look at how to examine the structure of the chest, topline, underline, and rear assembly. Please note that the dogs used as our models are not ‘show’ dogs but beloved pets, and getting them to stand for the exam was rather amusing at times. All three have fabulous ‘sits’ and will do so immediately on command (especially if they think you have cookies in your pocket!)
This is an exercise in how to physically examine a dog, so forgive their faults as they help us in this demonstration. My thanks to my daughter, Leah Keisler, and my husband, Jim, for their help in getting these photographs. Thanks also to Leah’s two: the Labrador, Thor, and her mixed-breed Collie, Oakley, and also to the fluffy (long-coated) Pembroke, Roxie, for their modeling skills on this hot summer day!
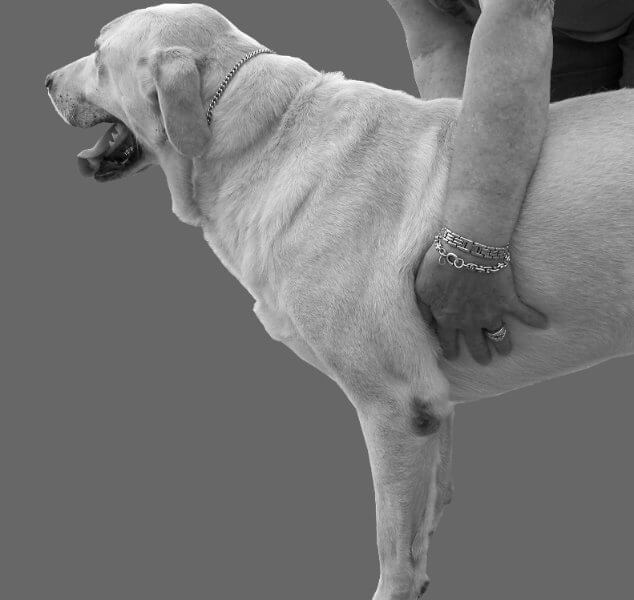
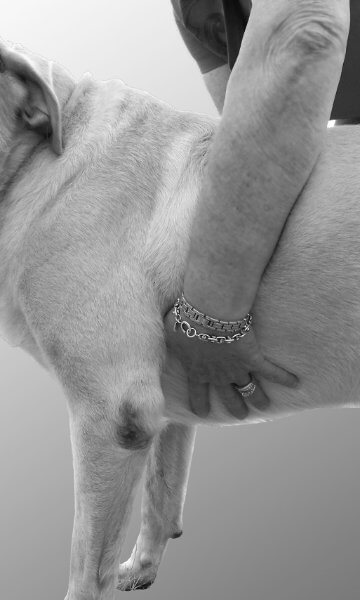
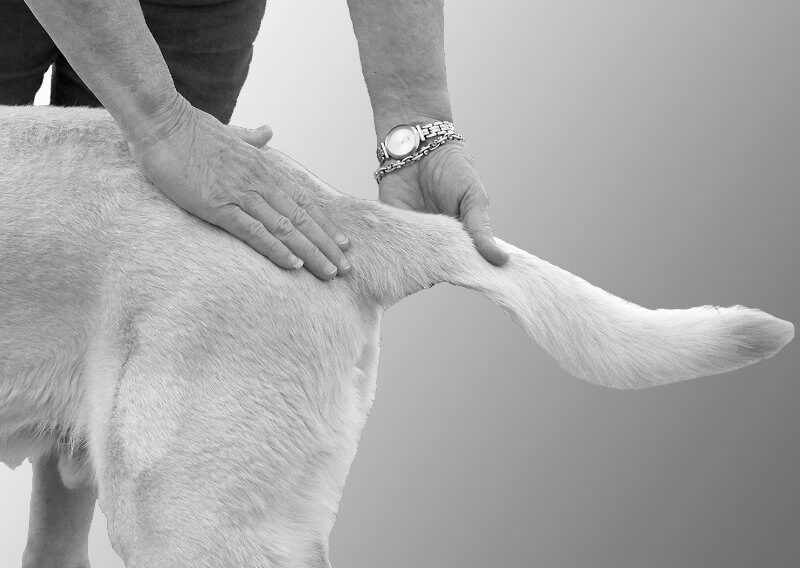
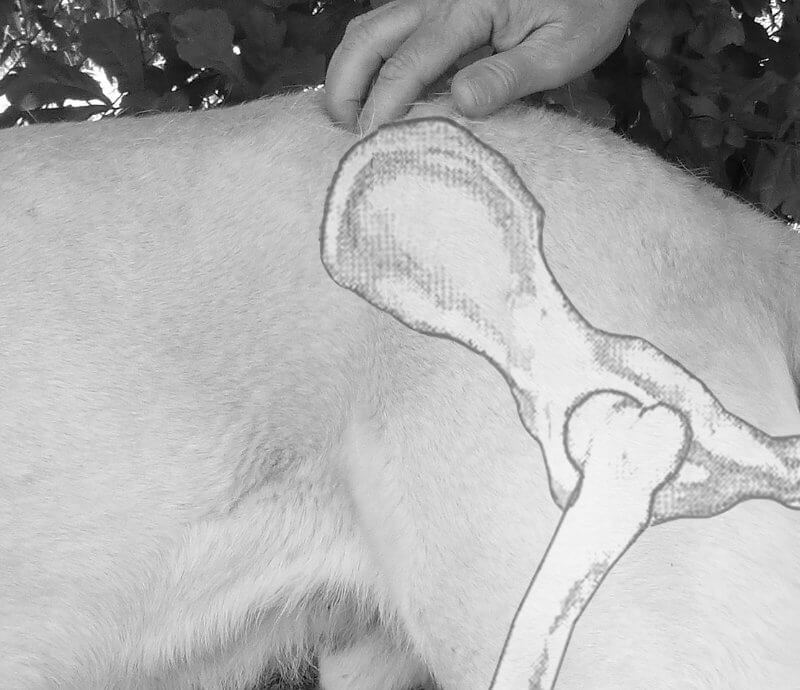
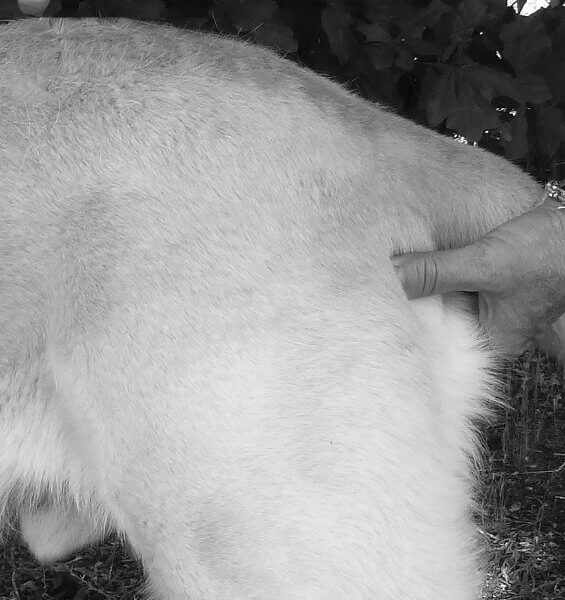
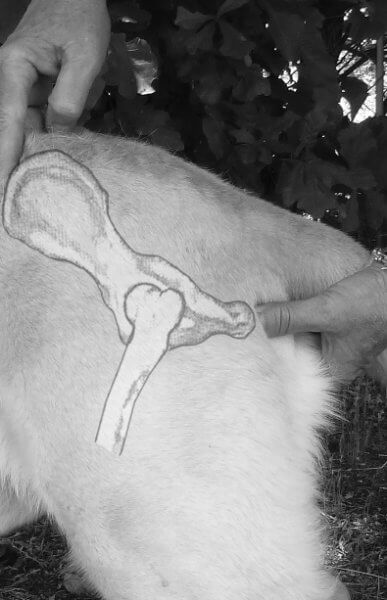
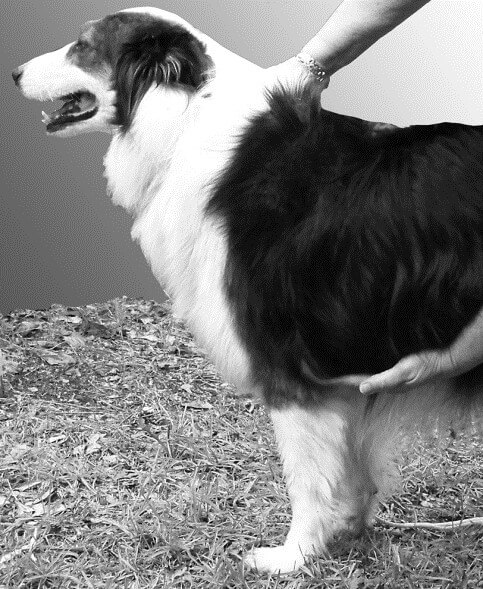
Immediately after you check the layback of the scapula and the angle of the front assembly, it is a simple thing to check the breadth of the dog’s ribcage and the spring of the rib. Standing beside the dog, with both hands palms down and thumbs close together at the tips, place a hand on either side of the spine with the fingers laid along the ribcage pointing down. See Figures 1 and 2.

From this position, you have the hands placed on either side of the dog and can easily feel how the ribs ‘spring’ out from the spinal column and then curve down and inward to attach to the sternum (breastbone) underneath the dog. See Figures 2, 3, and 4. In most breeds, the ribs flatten out somewhat behind the elbows so that the shoulder blade can rotate smoothly back and forth across the dog’s ribcage. A dog with ribs that are too rounded or muscles that bulge and push the shoulder blade out (loaded shoulders) causes a displacement of the elbow and a break in the column of support from the top of the shoulder to the foot.
The shape of the chest varies according to the function of the breed. Some breeds call for a more rounded ribcage. Chesapeake Bay Retriever: “Rib cage barrel round and deep.” Most call for an oval shape, but vary in the width of the chest: Whippet: “Brisket is very deep, reaching as nearly as possible to the point of the elbow. Ribs are well sprung but with no suggestion of barrel shape.” Lakeland Terrier: “The moderately narrow oval chest is deep, extending to the elbows. The ribs are well sprung and moderately rounded off the vertebrae.” Rottweiler: “The chest is roomy, broad, and deep, reaching to the elbow, with a well-pronounced forechest and well-sprung, oval ribs.”
A dog with a flattened ribcage, often called “slab-sided”, lacks rib spring. These dogs have very little spring of rib, and on physical examination, your hands go out from the spinal column very little and tend to mostly go straight down instead of feeling an arch outward and then gently reaching back under the dog toward the sternum. A slab-sided ribcage inhibits the bellows motion vital to the expansion and contraction of the dog’s ribcage (remember that the ribs are connected at the spine, and all but the last four are also connected to the sternum (breastbone).
The forward-most part of the sternum is called the prosternum, which may or may not protrude beyond the point of the shoulder and then curves down between the dog’s front legs toward the rear of the dog. I know of no breed standard that considers a truly flat-ribbed (slab-sided) chest to be a virtue, as it would inhibit the dog’s ability to breathe.
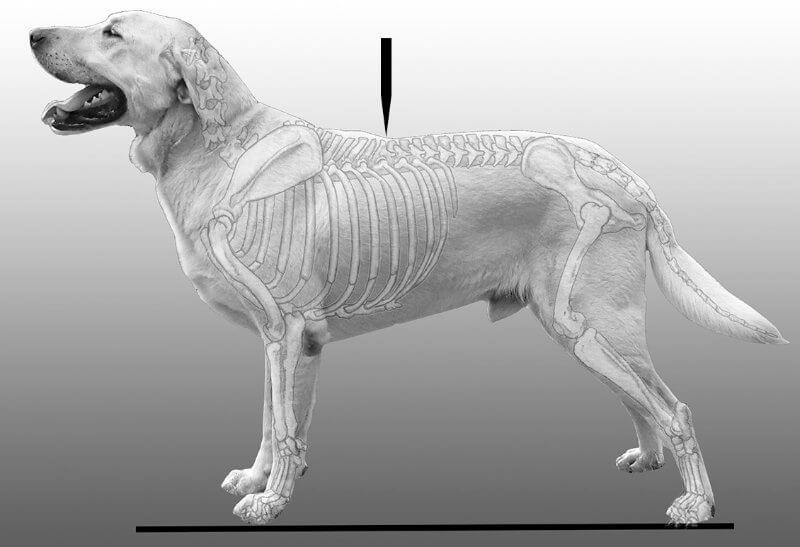
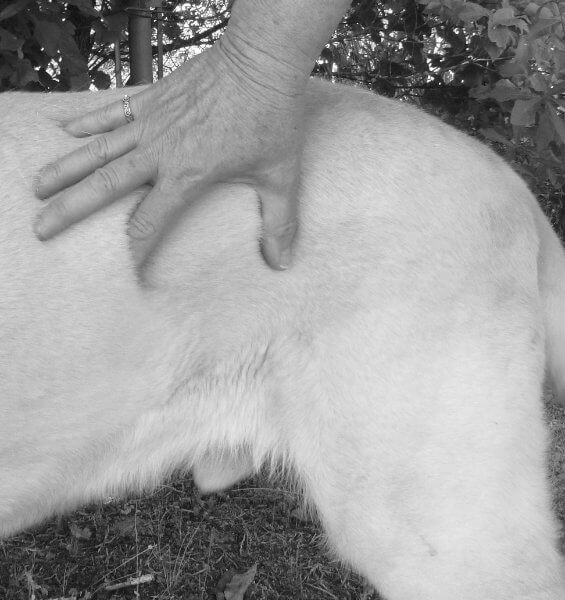
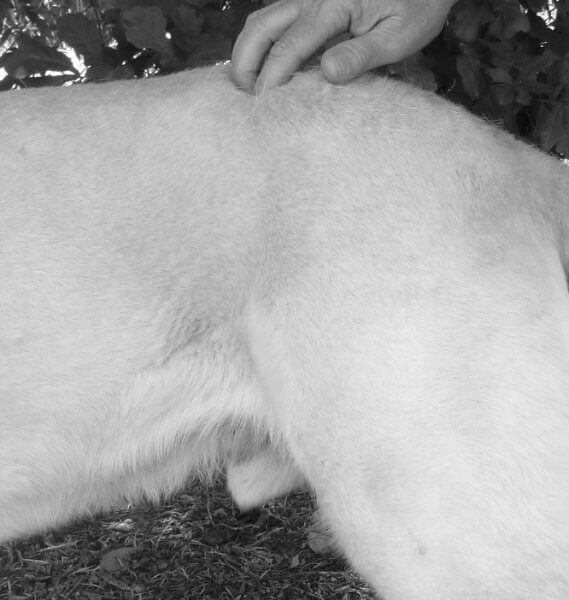
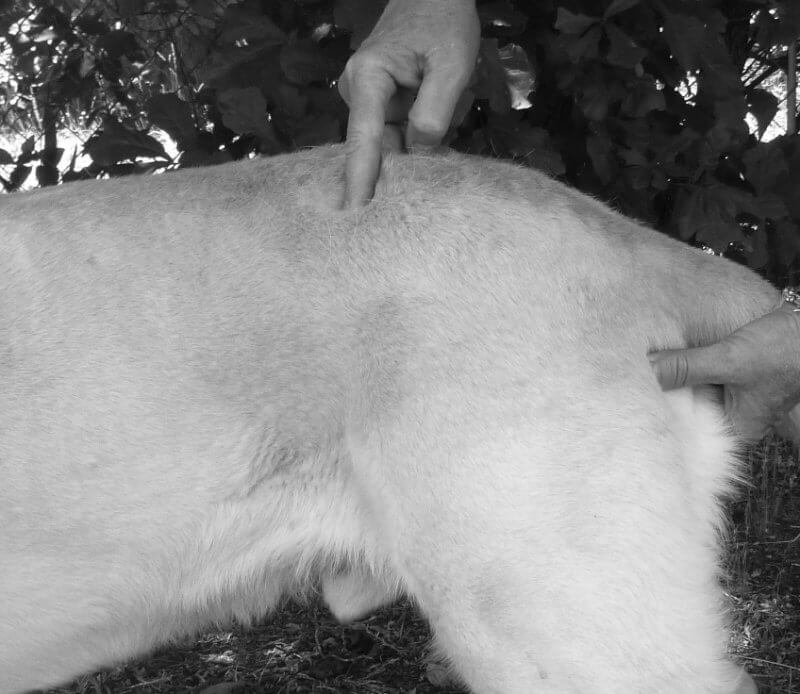
After checking the rib spring and elbow position, run your hand along the dog’s back from the withers to the tip of the tail. There is not much to feel when palpating the spine, mainly because there is so much muscling covering the bones. The spinal column gently curves along the various sections (cervical, thoracic, lumbar, and on to the tail). You might be able to feel a slight ‘nick’ (indicated by the vertical line on Figures 5 and 5a), but it may be difficult to find on a well-muscled dog. It is still a good idea to feel along the entire backline of the dog to note any dips or bumps, which can be an indication of the condition and muscle development of the dog. In very few breeds, you want to be able to feel each individual vertebra.
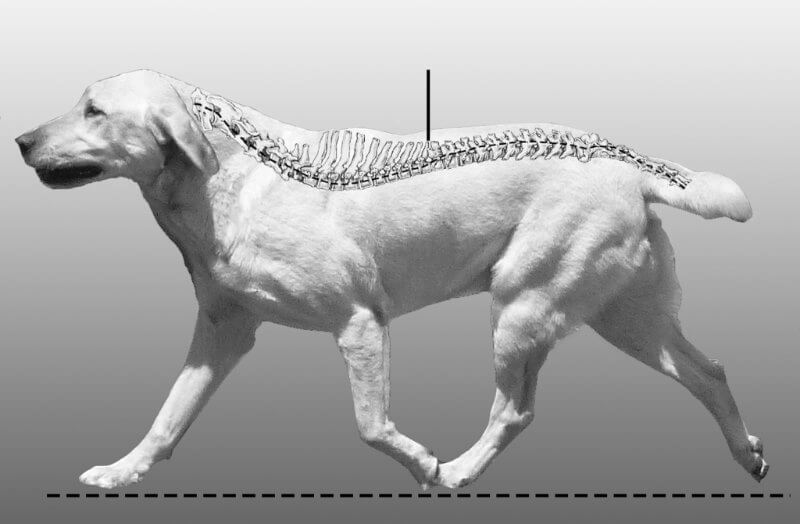
To recap, there are 13 thoracic vertebrae, which provide support and a place for the attachment of the ribs, as well as many projections and planes at which the various muscles of the neck and back attach to the spine. The first nine thoracic vertebrae are considered the ‘withers’ of the dog and are the point at which the highest point of the scapula is joined to the ribcage. The spine as a whole (starting at the neck) forms a very gentle S from the head to the tail, with the higher, longer first thoracic vertebrae pointing toward the rear of the dog. The last four thoracic vertebrae are more or less flat, form the midback of the dog, and are fairly level.
These four vertebrae also serve to carry ribs but, like the lumbar vertebrae (which do not attach to the ribcage), allow for freer up-and-down movement. Next come the seven lumbar vertebrae, which support and protect the abdominal organs, support the pelvis, and allow transmission of power from the rear assembly to the rest of the dog. Unlike the thoracic vertebrae, the lumbar vertebrae point toward the head of the dog. The sacral vertebrae group is attached on either side to the pelvis, forming a firm union through which the forces generated from the hindquarter are transmitted to the spinal column.
In addition to feeling along the topline, you should also continue on to the croup in order to determine the set of the tail. See Figure 6.
The croup is formed by the three fused sacral vertebrae and the first several tail (coccygeal) vertebrae. Together, these form a slightly curved area that is easily felt. A dog with a high tailset will have a relatively flat croup, and the curve of the croup is more accentuated the lower the set on the tail.
In addition to feeling along the topline, you should also continue on to the croup in order to determine the set of the tail.
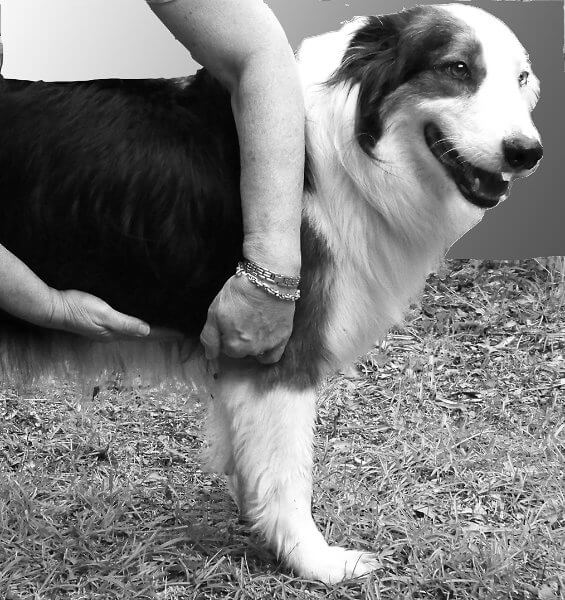
Next, we will check the length of the loin. It is fairly easy to find the last rib on the side of the dog. See Figure 7.
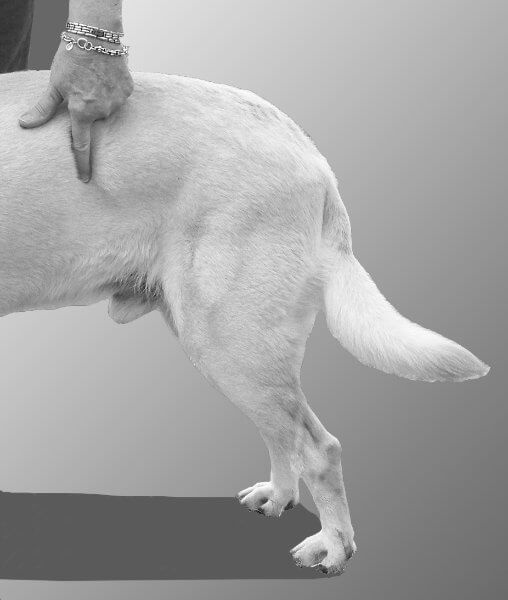
From that point, you only have to slide your thumb over on the dog’s side to find the end of the loin, which stops at the beginning of the hindquarters. See figure 8.
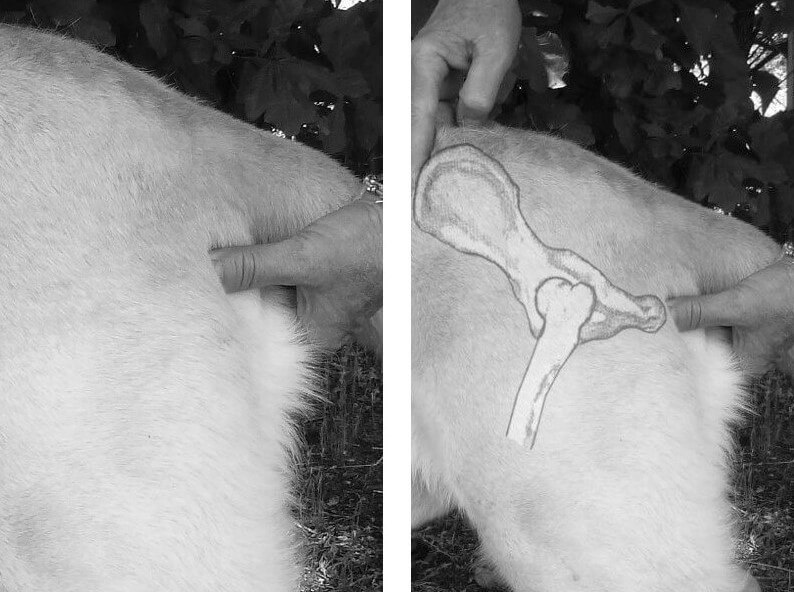
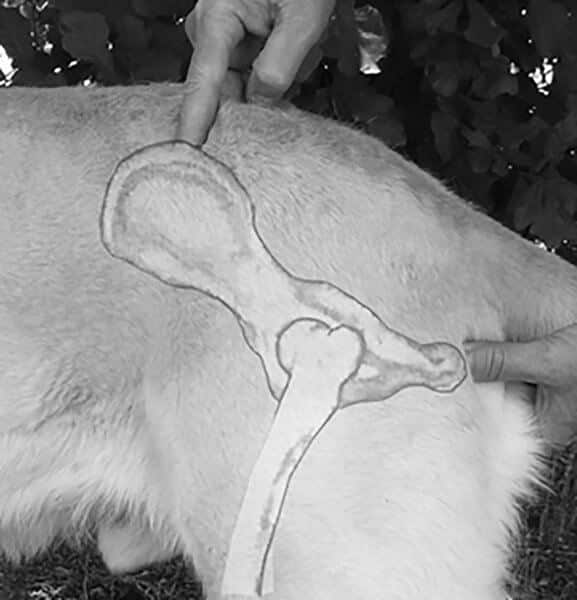
The next step is to ascertain the angle of the pelvis, which is harder to palpate than the much easier-to-feel spine of the scapula. Gently palpate down the spine until you can feel the ridge of the pelvis. You may be able to feel the side of the pelvis (ilium) up to the highest point of the bone (iliac crest). This will give you a general idea of where the top of the bone is located.
To try to determine the angle at which the pelvic bone is set, you must try to locate the pin bone (ischial tuberosity). The pin bone is easily palpated and is one of the landmarks that can help us determine structure without radiographic examination. See Figures 11 and 12.
The angle of the average dog’s pelvis is at a 30 degree angle to the ground. The slope of the pelvis determines the follow-through or backward extension of the hind foot. The angle of the croup determines the tail set. See Figures 13 and 14.
On a short-coated breed, it is easy to determine the bend of the stifle; on a coated breed, all you have to do is run your hand down the forward edge of the leg to follow the line down from the top of the leg past the stifle down to the junction with the hock. The hock is at the upper end of the rear pastern, which is between the hock joint and the foot.
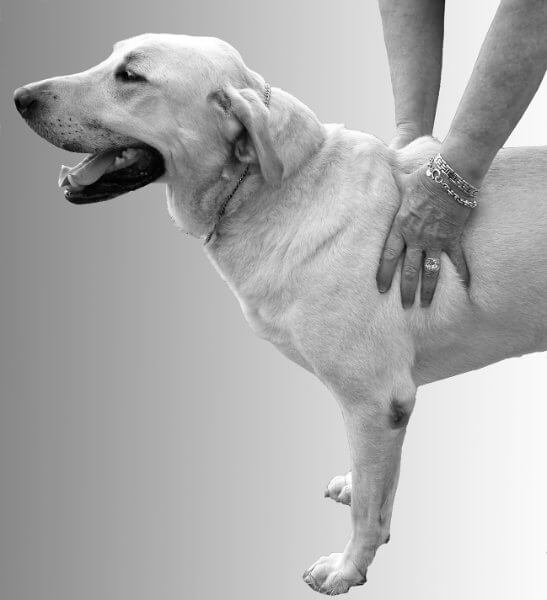
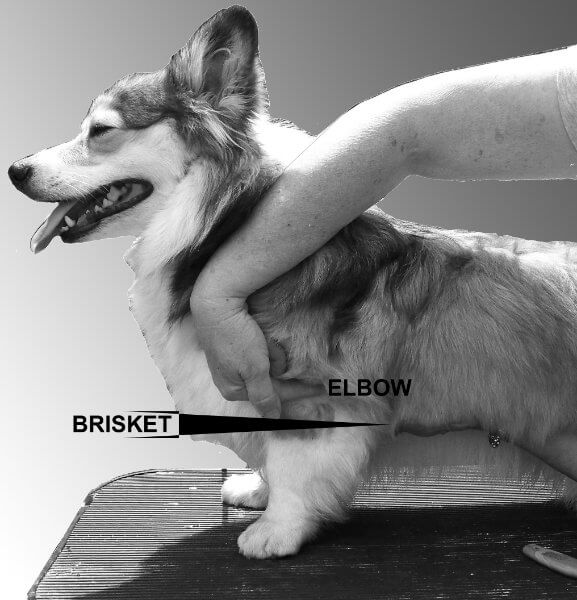
The final determination to be made concerning the outline of the dog is the underline. In a short-coated breed, the depth of the chest and its position relative to the elbow are easy to determine by a visual exam. In a coated breed, you simply have to use the palm of your flattened hand to move back the coat to see the position of the bottom of the chest (brisket or sternum) in relation to the elbow. See Figures 15 and 16. You can determine the amount of tuck-up at the same time. The majority of breed standards call for the elbow and the brisket to be at the same level.
The majority of breed standards call for the elbow and the brisket to be at the same level.
On a dwarf breed, the elbow naturally has to be positioned above the brisket but should not be so low as to encroach upon the area of the pastern. See Figure 17.
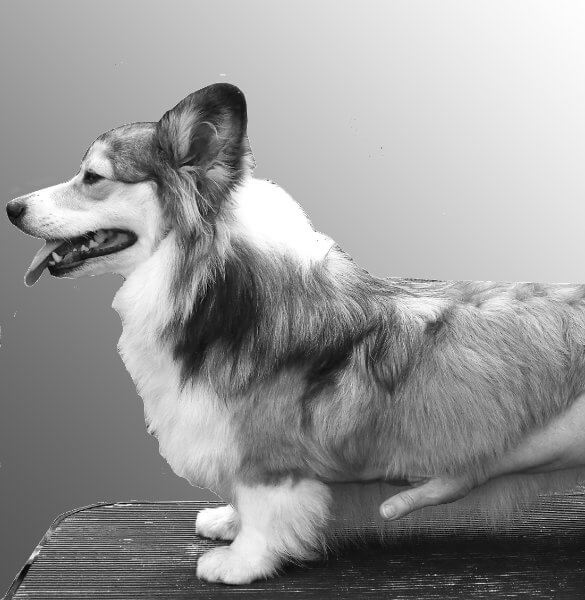
On this long-coated Pembroke (called a fluffy in the Standard), the elbow is definitely above the brisket. See Figure 18.
In the next article, we will begin the process of trying to relate movement to structure. To schedule a seminar or for any questions or comments, my email address is jimanie@welshcorgi.com.
Form Follows Function Part Six: The Hands on Exam 2
From the June 2019 Issue of Showsight Magazine.
This series originally appeared in the Working/Herding Digest. All rights reserved by the author.