


From the previous articles, you should have an understanding of the bare basics of the skeletal structure of the dog, upon which the dog is formed. The degree of angulation in front and rear is often specifically spelled out in the Standard and is the basis for understanding what the developers of the breed envisioned for energy-efficient movement in order for the breed to perform the functions for which it was developed.
What we have gone over previously are the very basics. For you to completely understand structure and movement, you will have to delve a little deeper on your own. In my 50 years “in dogs,” I find that I am still learning about the subject. This is not something in which one can become an expert overnight, but even the basic information should help you with quality control in trying to produce a dog that exemplifies breed character and purposeful function.
I do not totally agree with those who say that one is born with or without an eye for a dog. While there are many people who have an innate feel for balance and what constitutes beauty in a dog, I really believe that anyone can be taught the fundamentals of how to determine if a dog has show potential or not. First, we must learn to simplify and acquire a pattern for seeing and feeling the complicated things that one encounters in trying to assess a dog both standing and in motion. Let us now try to put into action what we have learned about structure.
While there are many people who have an innate feel for balance and what constitutes beauty in a dog, I really believe that anyone can be taught the fundamentals of how to determine if a dog has show potential or not.
Our first step in assessment is a visual examination. On a short-haired dog, this portion of the exam is obviously easier than on a coated breed. Even so, you should have an inkling of what you want to further explore when you do the physical exam. You should get into the habit of listing what you are seeing, either by saying it out loud or writing it down as you go. This is a great way to keep records on each of your dogs or when evaluating a litter. You will make note of all of your impressions throughout this entire procedure. Writing it down is best, especially if you are evaluating a litter.
A good pattern to use in assessing a dog is basically an expansion of the procedure a judge goes through in the conformation ring. The judge usually first “walks the line” from a distance, getting an overall impression of each dog. Then they move the group as a whole to compare side gait and then go on to individually examine each dog both physically and in motion (down, back, around).
Before we begin with our visual assessment, let me remind you that what we are doing is an analysis of the structure of the dog. In order to do this, we must separate the whole into its parts for analysis. What we are not doing is criticizing the dog in the photo. We all know that there are few, if any, dogs who have no faults. Criticism is looking solely for the faults and disregarding the virtues. Analysis leads to insight. Criticism leads nowhere!
With your own dog and with the help of a friend as a handler, your visual assessment begins with the view of the dog from the side. From a distance of approximately 15 feet, you will begin by looking at the whole dog, taking in the all-important profile. For the purpose of training your eye to assess a dog, it might be easier when viewing them from the side to roughly separate the dog into three sections:
When doing this, for the sake of our assessment, consider the body of the dog to be the area encompassing the back and loin, from behind the neck to the end of the loin, which is the beginning of the hindquarter. (The true body would also include the part of the chest to which the front assembly is affixed, but not in our exercise.) For our purposes, these three sections would be roughly equal. The rear assembly should be nearly equal in breadth to the front assembly.
Your first impression begins with the outline of the dog. What is the relationship between the proportion of height to body length, the proportion of muzzle to skull, and the position of the muzzle to skull planes relative to each other? What is the reach of the neck and the position of the legs under the dog? Still viewing the dog from the side, you can also follow the topline from the occiput down the neck, past the withers over the back, on to the tail set, and then note the position of the tail at rest.
From the tail, you would then work your way back, looking underneath the dog to determine the position and length of the hock and see the bend of the stifle. Your gaze will continue up from the stifle to follow the underline of the dog, on to the position of the front legs, and then on to the prosternum and neck. Follow the neck to the under jaw, which brings us back to where we started.
When performing a breed examination, one should always seek out the breed characteristics that make the breed unique first while also taking note of the areas that deviate from the Standard. I will remind you here that we are analyzing the ‘average’ dog. For example, you would not expect a Whippet to have the same shape and width of body that you would find in a Bull Terrier. I used the Pointer for this exercise because it is an average dog, and with its short coat, it is easy to see in a photograph.
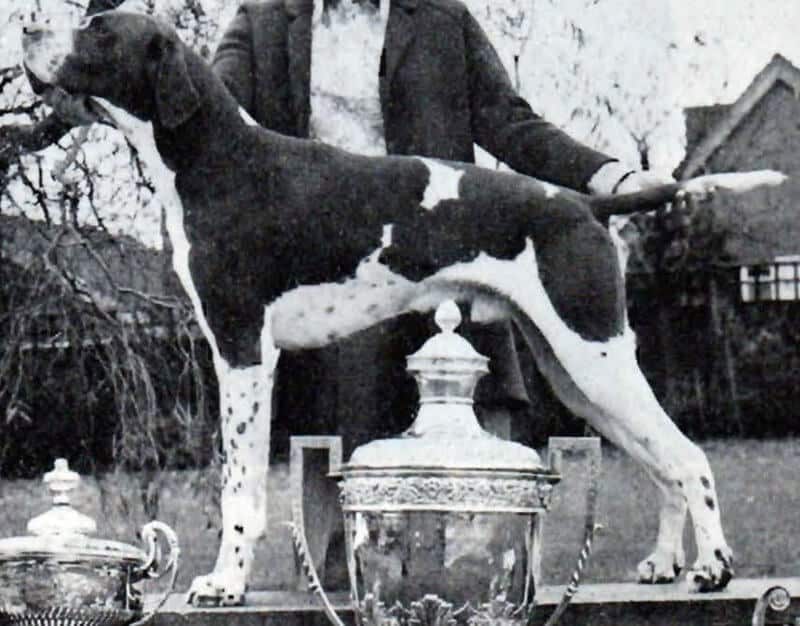
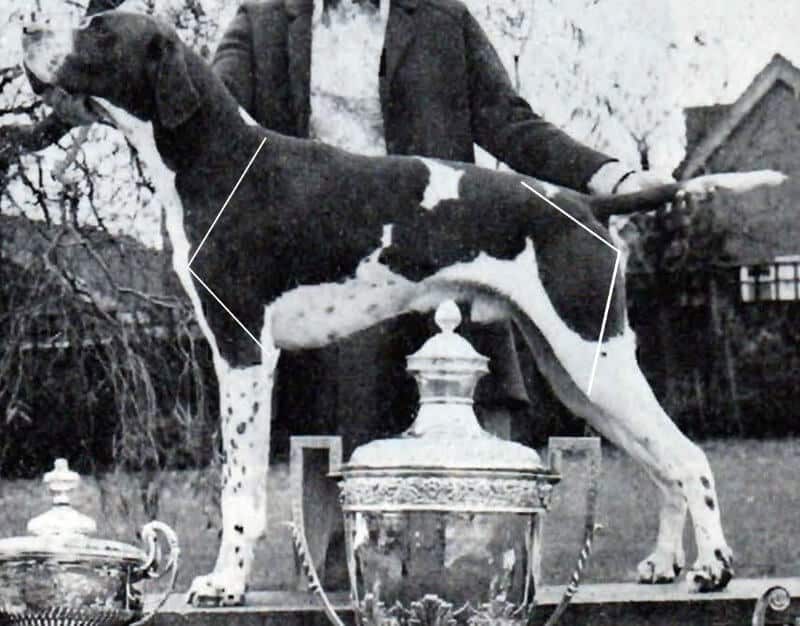
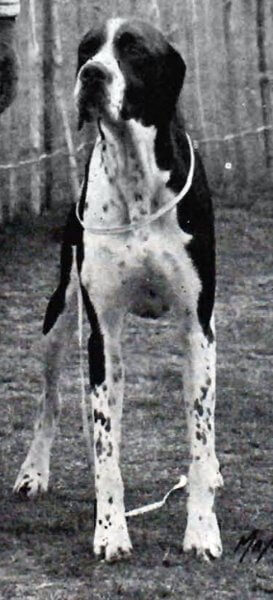
Let us now look at the Pointer in Figure 1. This is a dog born in the late 1960s. He was a multiple Best in Show winner and a leading sire in the 1970s in the United Kingdom. Before beginning this exercise, go to the AKC website and print out a PDF file of the Standard for the Pointer to use as a reference. This dog is set up on a stand, which elevates him a bit and gives a little different perspective to the outline than if he were on the ground.
At first glance, you may think the dog to be a bit leggy, but when you compare the length of the leg to the depth from wither to brisket, you realize it is the fact that you are used to looking down at the dog and not on the same level as this camera angle that gives you the first (incorrect) impression. The perspective of the angle of the camera lens and the position of the dog can really change what is perceived when trying to evaluate a dog in two dimensions instead of three. (In other words, never trust a picture!)
In outline, he is a proportionately square dog with balanced, though moderate, angulation front and rear. The head planes are parallel, which is acceptable in the breed. There is good length in the muzzle when compared to the skull. From this angle, the flews look a bit pendulous, or the dog may need more depth under the jaw, both of which will need to be checked on a closer exam. The ears are correctly set at eye level and reach just below the jaw when you compensate for what seems to be a slight tilt up of the jaw by the handler.

On this Pointer, you can see that the stop is pronounced, even though the muzzle seems to be turned a little bit toward the camera. Following the line behind the head down the neck, which, to be ideal, could be longer, In this case, the length of the neck actually balances with the rest of the dog. The neck blends smoothly into the straight back (one must ignore the white markings that are trying to make his back look dippy) at the well-muscled withers. The back slopes very slightly from the withers to the croup, which falls slightly to the set-on of the tail. The tail seems to be a ‘bee sting’ tail of the correct length (no longer than the hock). The thighs look to be a bit on the narrow side, and the stifles look to be moderately bent instead of well bent.
The underline shows excellent depth of chest (solidly down to the elbow) with a moderate amount of tucking up. The feet and legs seem to be of the correct shape and substance, with the required slight slant to the pasterns. The front legs seem to be a bit forward, yet the elbow is correctly placed beneath the wither. The forechest is just visible and could be a bit more pronounced (“breastbone bold, without being unduly prominent”). The neck blends well into the line of the jaw without any appearance of a dewlap or excess skin. The first impression is of a well-balanced dog in all his parts, even though he seems to lack angulation somewhat at both ends. At first examination, he shows no hound or terrier-like traits, which in this breed are most undesirable.
Once you have completed the initial assessment of the dog from the side, you should position yourself in front of the dog, from where you will then walk around the naturally standing dog in a circle from front to rear to complete the visual exam. From the front, you can see such things as the set of the ears, eye placement, shape or fullness of the muzzle, depth of the underjaw, and proportion of the breadth of the muzzle to the skull. Your eye will follow down the neck to note the breadth of the chest and the placement of the front legs, and you will look at the pasterns and the feet.
This is also a good time to assess bone shape and substance. Is the chest wide or narrow, deep or shallow, and is there evidence of a fore chest? Are the legs parallel to each other? Do the feet point forward, inward, or outward? Is the bone correct for the breed? Again, this is a visual assessment, and you may not be able to see much on a coated dog, but you can still get an impression of what should be checked more closely on a physical exam.

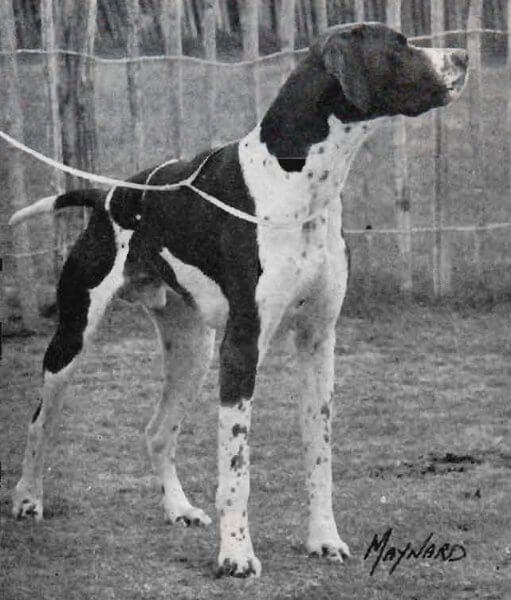
Our exam continues in Figure 2, looking at the dog from the front. At this angle, the dog is standing naturally, and you can see the straight bones of the front legs parallel to each other with just a very slight turn in of the front feet toward the center line of the dog. He has good oval feet with well-padded toes. The elbows are not prominent, and one can easily see that the chest is as it should be: deep rather than wide. The prosternum is evident. You can see that the nose is well developed and the nostrils are wide open. The ears are set correctly and hang close to the skull, reaching just below the lower jaw. The eyes are of good size but are more of an almond shape instead of rounded as called for in the Standard.
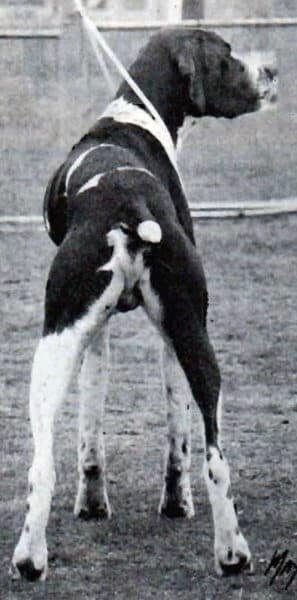
Walking around the dog to the rear, you can get a closer look at the neck and how it blends into the backline, as well as the position and height of the withers. From the rear, you should also be able to assess the length of the loin and the set of the tail. When you are positioned behind the dog, it is easier to see the length of the neck and how it blends into the backline. You should take a good look at the spring of the rib and the breadth of the loin.
Your eye will then drop down to compare the position of the back legs to those of the front, as well as the bone, height of hock to ground, relationship of the legs to each other, bone substance, and foot shape and placement. In Figure 3, we can also see how well muscled the hindquarters are and that the hocks are well let down.
During the visual exam, the color of the dog, the pigment, and the expression can also be readily seen and evaluated. You must learn to disregard color and, especially, markings during this first exam, as these can distort your perception of what is actually there. If there are color or marking disqualifications, this can be noted and closely examined during the hands-on examination. Through simple observation, much can be gleaned about the structure of a dog. The correctness of a breed can be determined with a simple visual exam. Over time, your method of completing a visual exam will develop into a unique pattern that you can do quickly with little conscious thought, giving you a good first impression of the qualities of the dog and what areas you need to check on a physical examination.
You must learn to disregard color and, especially, markings during this first exam, as these can distort your perception of what is actually there.
The first impression of this dog is of a Pointer of “compact power and agile grace; the head noble, proudly carried; the expression intelligent and alert; the muscular body bespeaking both staying power and dash“, as quoted from the AKC Standard on the breed. It matters little that this dog was from nearly 50 years ago. His beauty is just as valid today, with his overall balance, proud outlook, and muscular body.
Again, as quoted from the Standard, “a smooth, balanced dog is to be more desired than a dog with strongly contrasting good points and faults.” The clarion call for balance can be found in almost every breed standard. Structurally, it is far better to have a dog that is balanced in their lack of angulation (as is this dog) than to have a dog that is unbalanced in angles from front to rear. The balanced dog will take more steps to cover the ground than would a better-angled dog, but the dog with a straight front and a better-angled rear will eventually end up broken down in the front and unable to hunt. I’d rather have a dog at the end of the day that was extremely tired but that could hunt another day than a broken-down dog that could not hunt at all!
In the next installment, I will attempt to take you through the steps necessary for you to perform a complete and breed-specific physical examination of the dog. Emphasis will be placed on how to determine with your hands what your eyes, perhaps, cannot see. Until then, any questions or comments can be directed to me at jimanie@welshcorgi.com. Photographs supplied by the longtime American Pointer Club historian and my great friend, Karen Blasche, with my appreciation for her help
Form Follows Function: Part Four of the Series. From the April 2019 Issue of Showsight Magazine.
This series originally appeared in the Working/Herding Digest. All rights reserved by the author.